ReferRush offers two ways to set up your referral email system: Quick Setup and Customizable Setup. This guide walks you through both methods, ensuring your referral emails are professional and effective.
Quick Setup Method
Use the setup wizard for a fast, guided configuration.
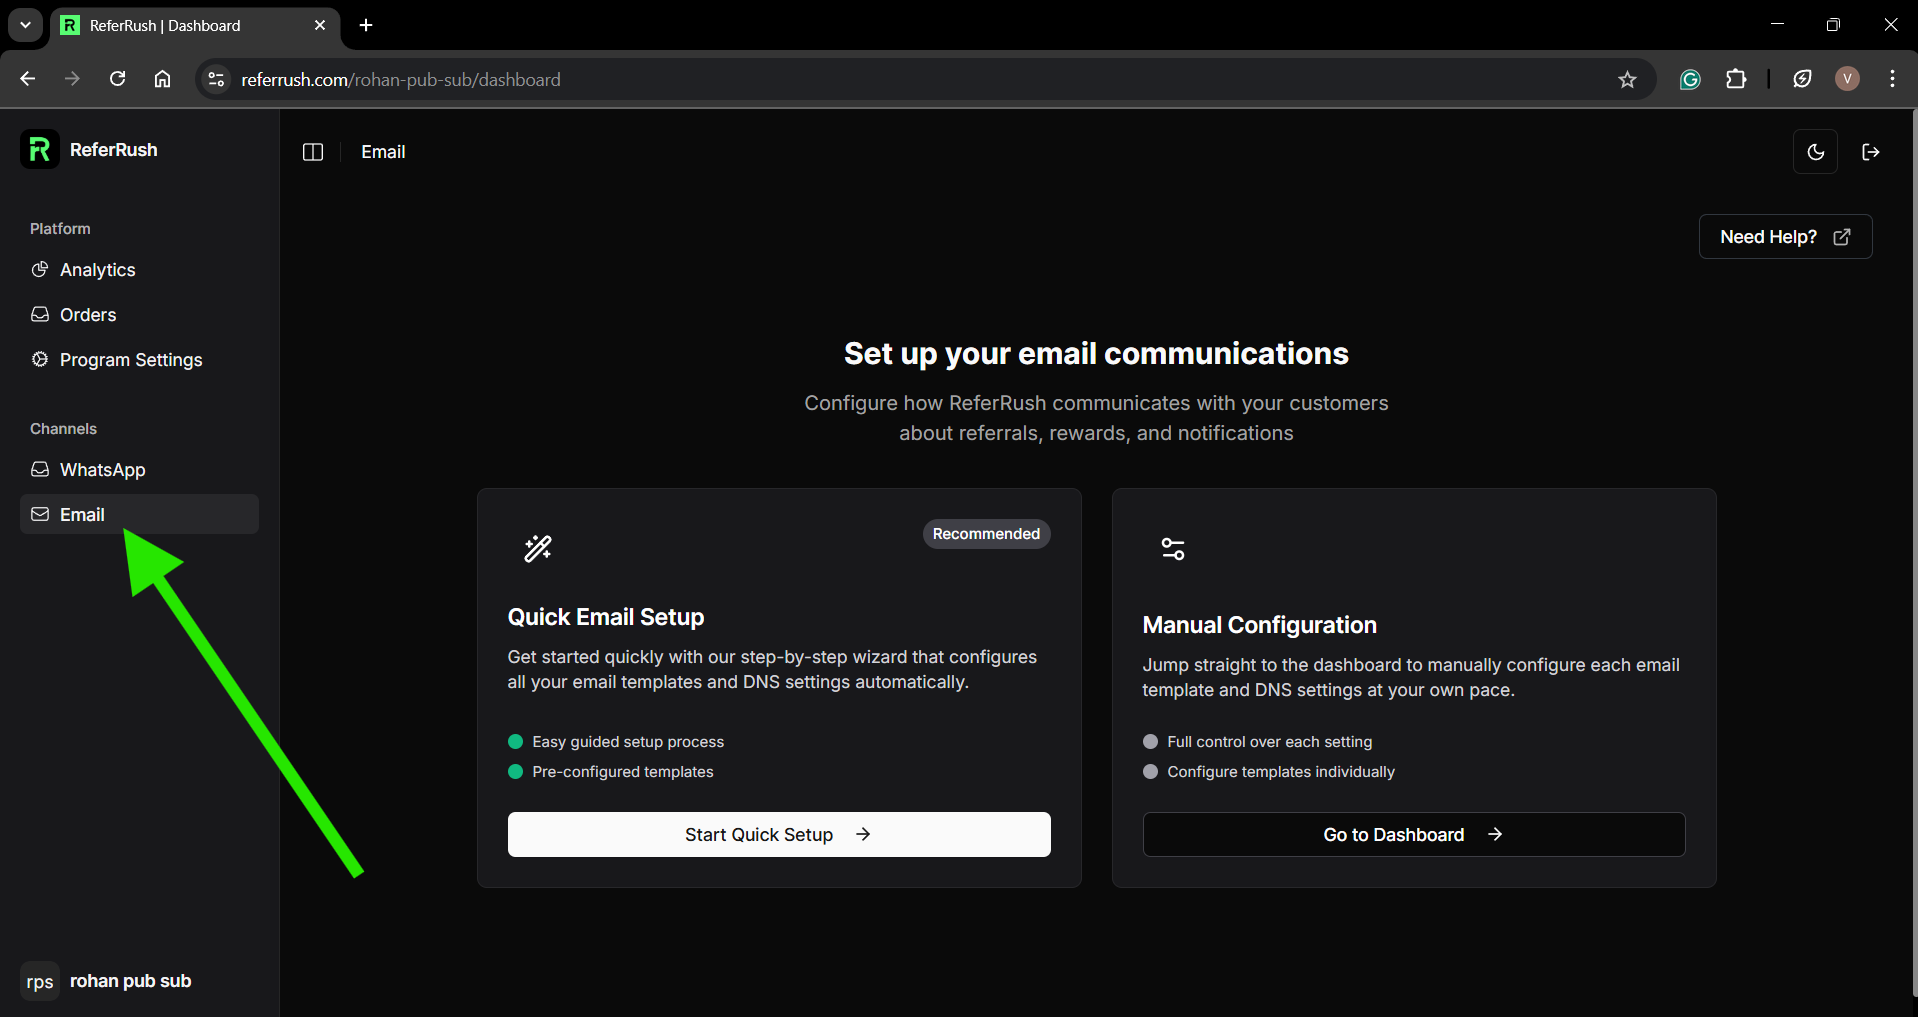
Step 1: Access Email Setup
- Navigate to your ReferRush dashboard.
- Click on the “Email” tab in the navigation menu.
- If this is your first time, you’ll be prompted to set up your email system.

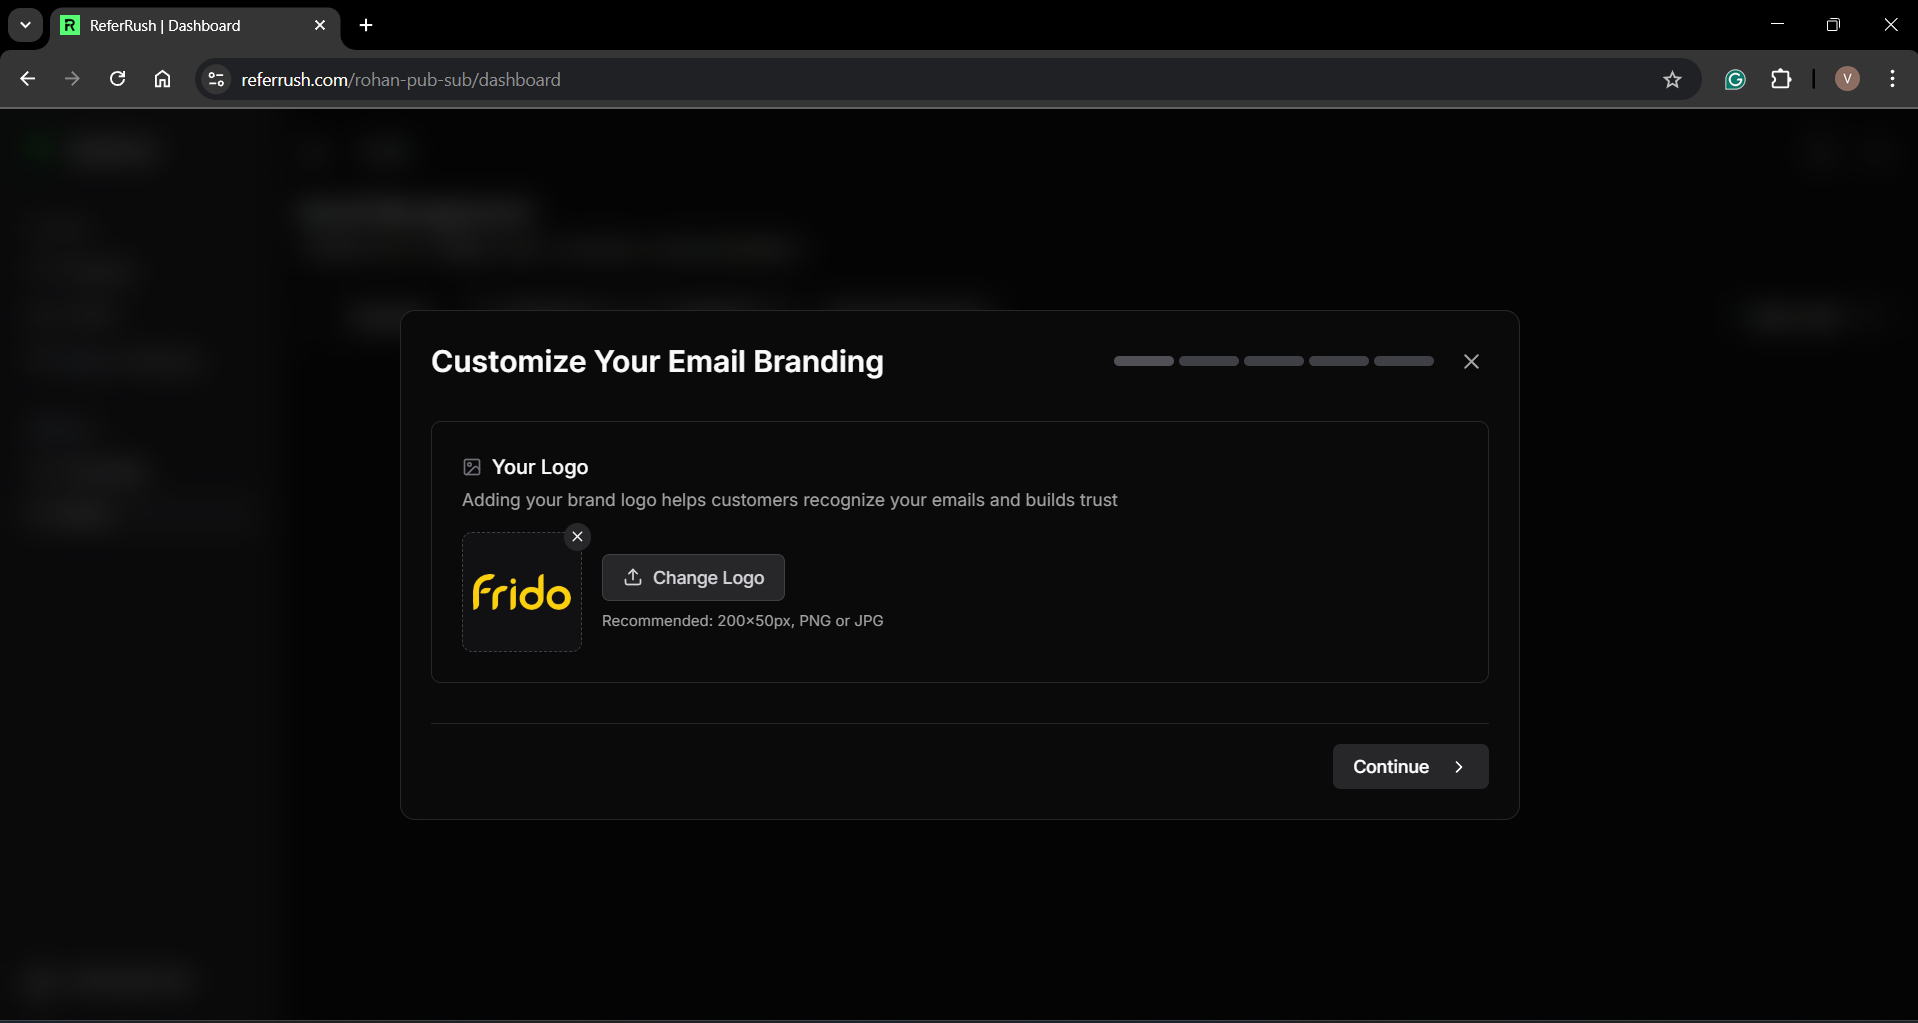
Step 2: Upload Your Logo
- In the Email Setup Wizard, start with logo configuration.
- Click “Upload Logo” to select your brand logo.
- Size: 600×225px
- Format: PNG with transparent background
- File size: Less than 50KB
- Quality: High quality, with colors that work in both light & dark mode
- Preview how your logo appears & click “Continue” when satisfied.

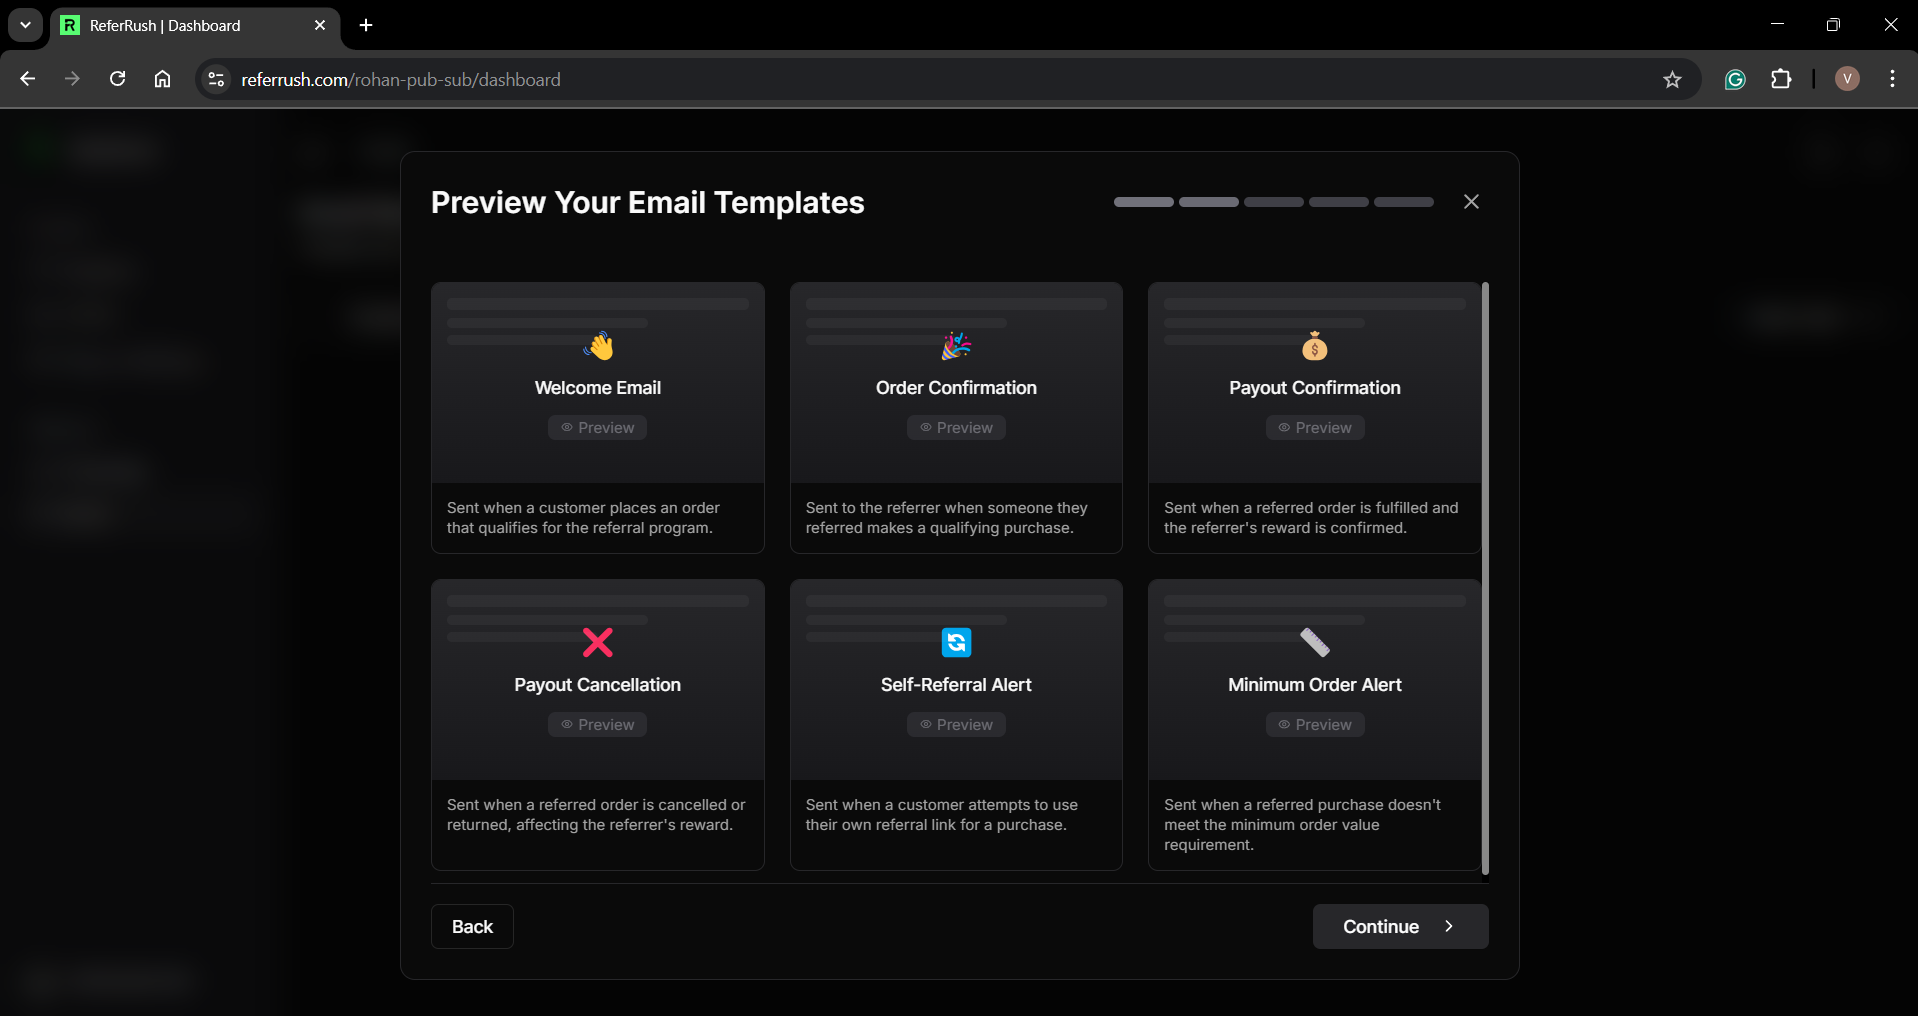
Step 3: Preview Email Templates
-
Browse through the six standard email templates:
- Welcome Email: Sent after purchase or delivery.
- Order Notification: Sent when someone uses a referral link.
- Payout Notification: Sent when a referred order is delivered.
- Payout Cancellation: Sent when a referred order fails.
- Self-Referral Alert: Sent when someone uses their own link.
- Min Order Alert: Sent when order is below minimum requirements.

-
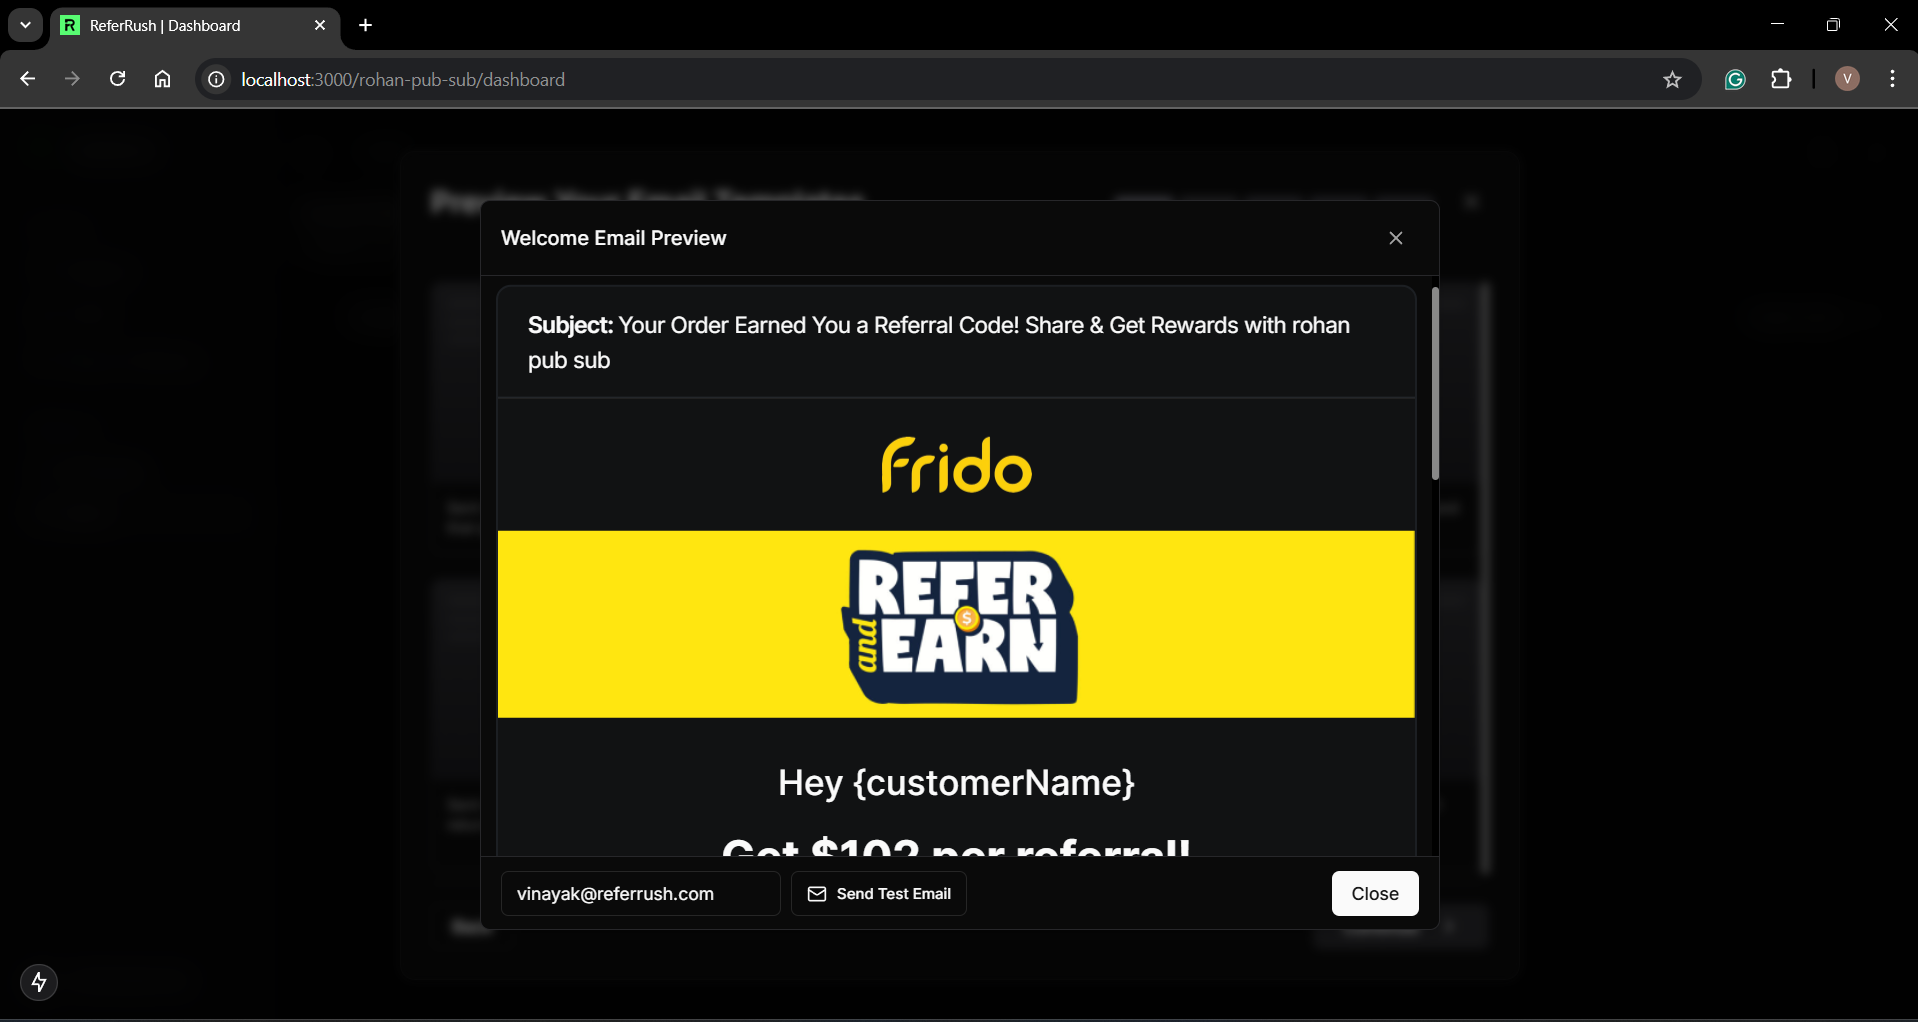
Click any template to preview its appearance & test the emails.
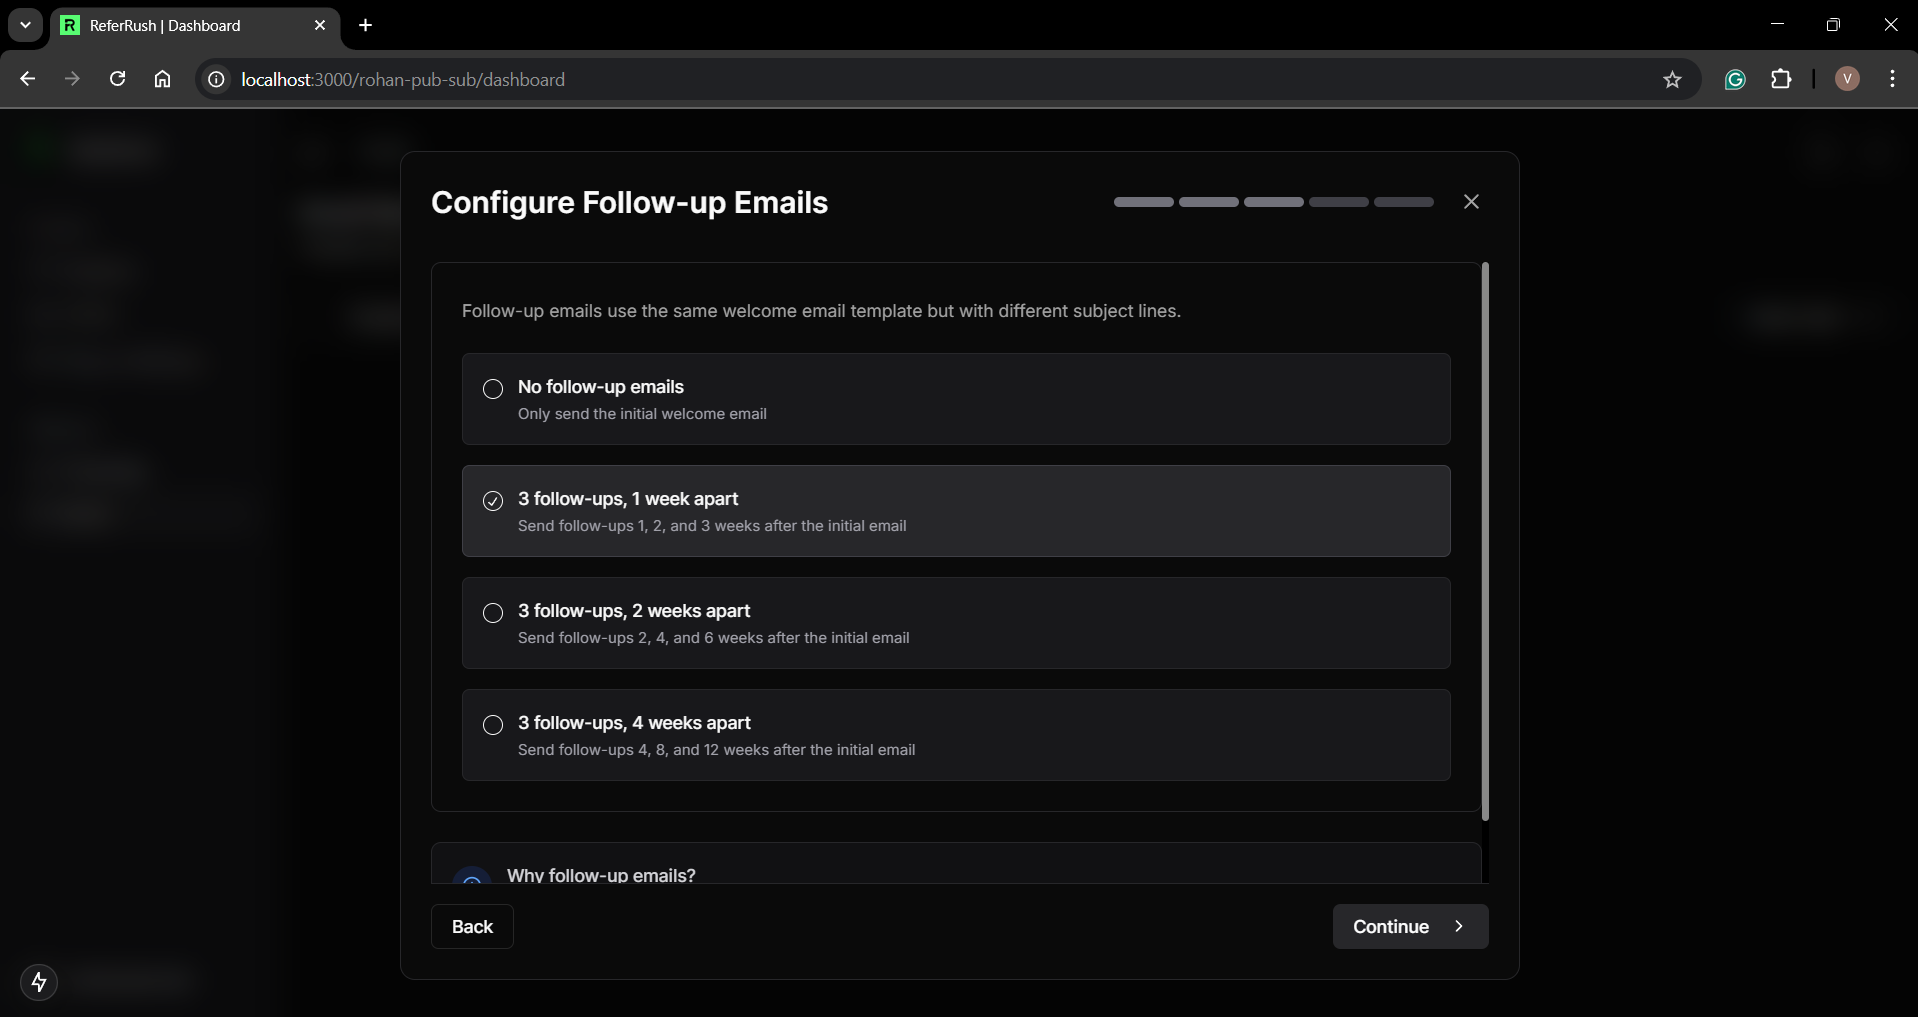
- Choose your preferred follow-up schedule:
- 3 follow-ups, 1 week apart (recommended)
- 3 follow-ups, 2 weeks apart
- 3 follow-ups, 4 weeks apart
- No follow-up emails
- Click “Continue” to proceed.
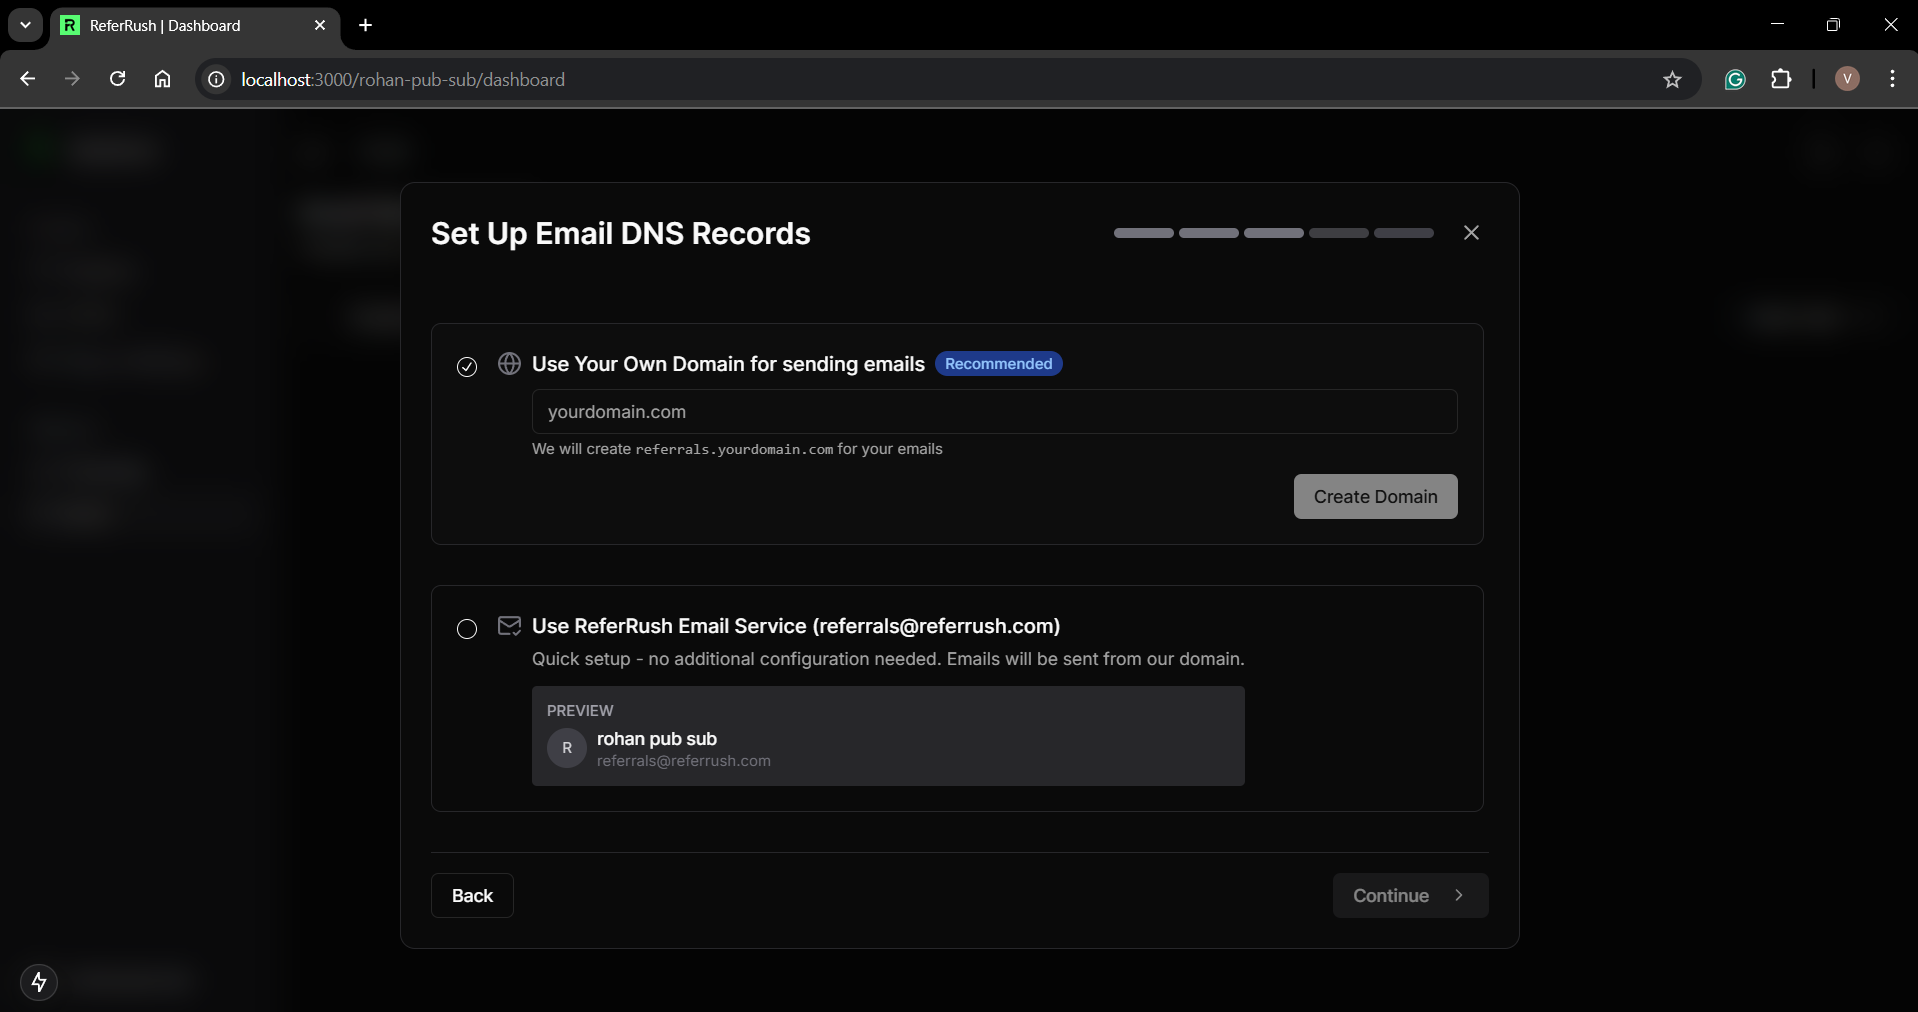
Step 5: Set Up Email DNS Records
-
Choose between:
- Custom domain (recommended): Sends emails from your own domain (e.g.,
hello@yourbrand.com). Requires DNS setup.
- ReferRush email address: Sends emails from a ReferRush address (e.g.,
yourbrand@referrush.co). Quickest option, no DNS setup needed.
-
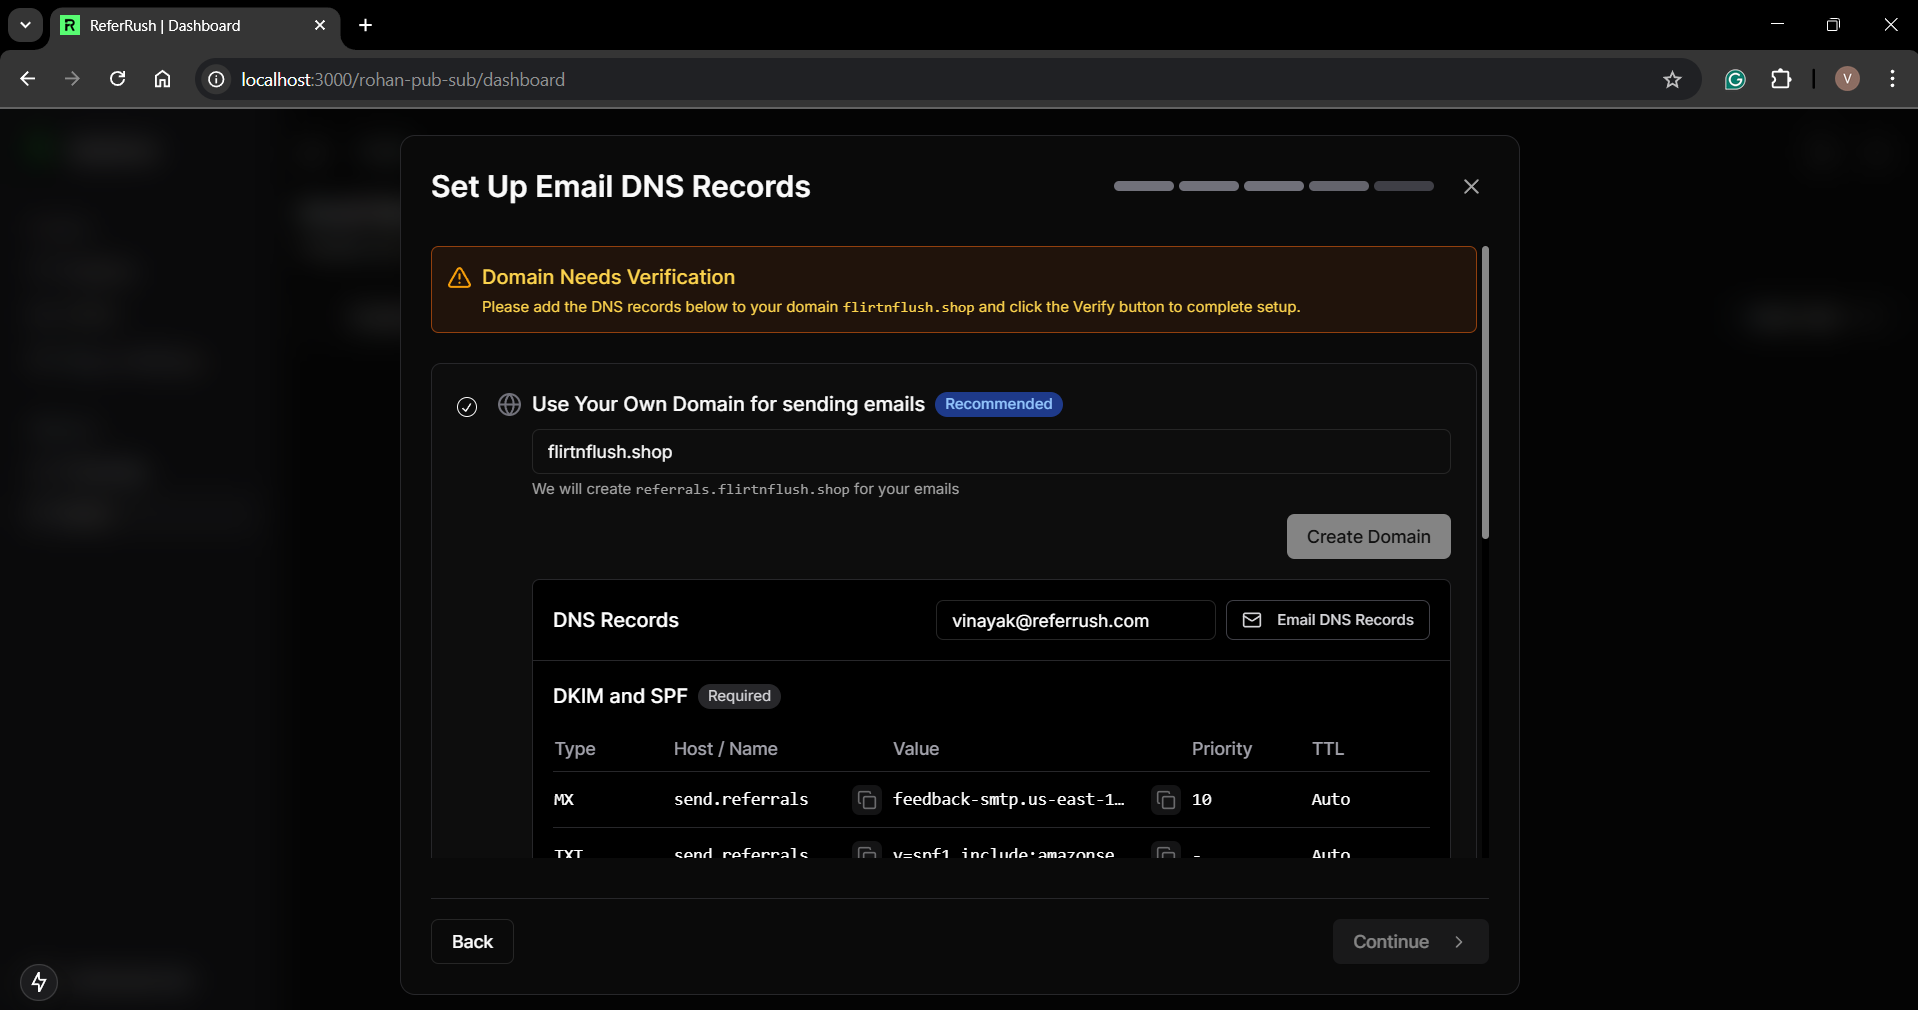
For custom domain:
- Click “Create Domain”.
- ReferRush will display the required DNS records (like TXT, CNAME, or MX).
- Add these records to your domain provider’s DNS settings (e.g., GoDaddy, Cloudflare, Namecheap).
- Return to ReferRush and click “Verify Domain”. Verification can take some time (minutes to hours).

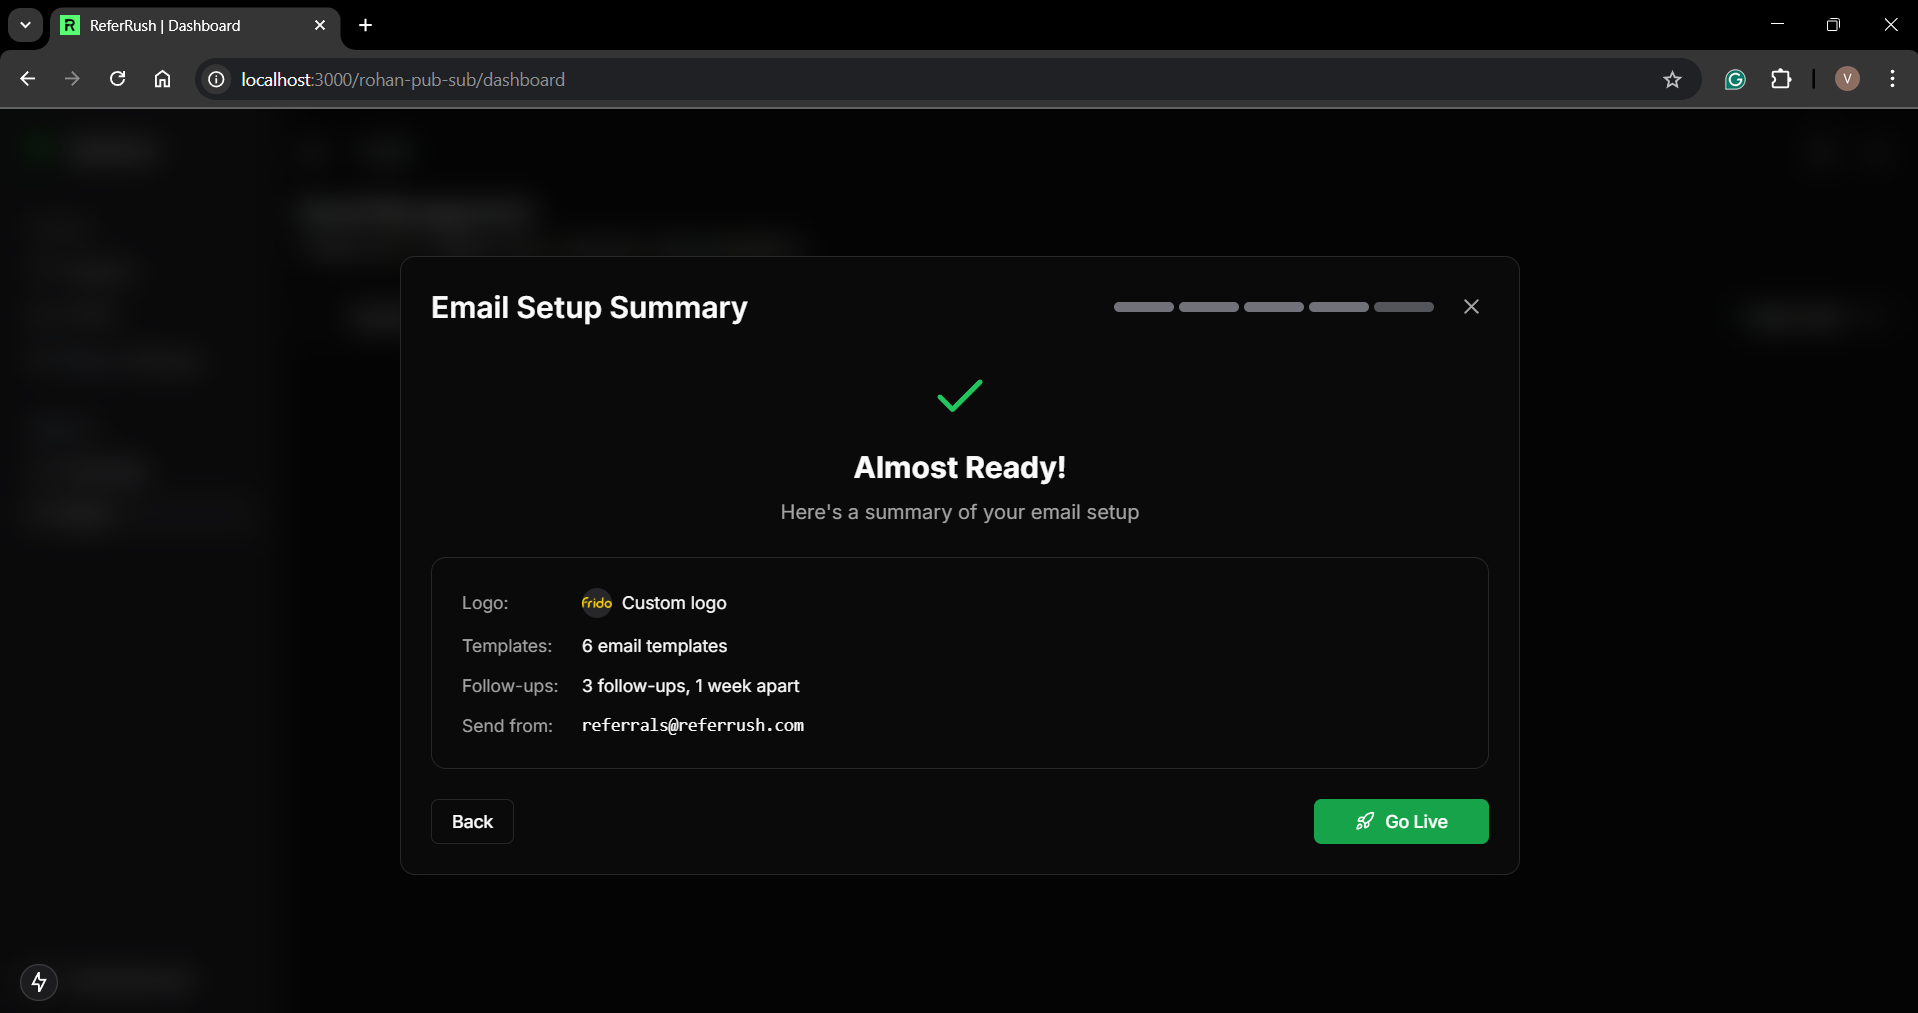
Step 6: Email Setup Summary
- Review your complete email configuration summary.
- Click “Go Live” to activate your email settings and start sending referral emails to your customers.

Customizable Setup Method
For fine-grained control over templates, follow-ups, and settings.
Step 1: Access Email Dashboard
- From your ReferRush dashboard, click the “Email” tab.
- If presented with the setup choice screen, select “Go to Dashboard”.
Step 2: Understand the Email Dashboard
The email dashboard has three main tabs for customization:
- Templates: Customize individual email content, subject lines, and appearance.
- Followups: Configure the automatic follow-up email schedule.
- Settings: Manage domain configuration (DNS) and activate/deactivate emails.
- Navigate to the Templates tab.
- Use the dropdown selector to choose the specific email template you want to edit (Welcome, Order Notification, etc.).
- Upload Your Logo:
- Find the logo upload section within the template editor.
- Click “Upload Logo” and select your brand image.
-
- Size: 600×225px
- Format: PNG with transparent background
- File size: Less than 50KB
- Quality: High quality, with colors that work in both light & dark mode
- Your logo will automatically apply to all email templates.
- Customize Content: For each template, you can modify:
- Email subject lines
- Banner images (especially for Welcome emails)
- Body text, calls-to-action, and sharing messages.
- Remember to save changes for each template you edit.
Step 4: Set Up Follow-up Schedule
- Navigate to the Followups tab.
- Choose your preferred follow-up frequency:
- 3 emails, 1 week apart (recommended)
- 3 emails, 2 weeks apart
- 3 emails, 4 weeks apart
- No follow-ups
- Save your selection.
Step 5: Configure Domain Settings
- Go to the Settings tab.
- Choose your sending method:
- Custom Domain (Recommended): Sends emails from your brand’s domain.
- ReferRush Email: Sends emails from a ReferRush-provided address.
- To set up a Custom Domain:
- Enter your desired sending domain name (e.g.,
yourbrand.com).
- Click “Create Domain”.
- Add the displayed DNS records to your domain provider’s settings.
- Click “Verify Domain” in ReferRush once the records are added.

Step 6: Activate Email Communications
- Once all templates, follow-ups, and domain settings are configured to your satisfaction, navigate to the Settings tab.
- Click the “Go Live” or “Activate Emails” button.
- Confirm activation in the dialog box that appears.
- Your emails are now active and will be sent automatically based on the trigger events (e.g., purchase, delivery, referral usage).
Best Practices for Referral Emails
- Subject Lines: Keep them concise, engaging, and clearly state the email’s purpose.
- Branding: Ensure your logo and brand voice are consistent across all templates.
- Testing: Send test emails to yourself to check appearance and links on different devices (desktop, mobile) and email clients (Gmail, Outlook).
- Clarity: Make the call-to-action (sharing the link, checking rewards) clear and easy to find.
Troubleshooting Common Issues
- Logo Problems:
- Appears too small/large: Ensure dimensions are close to the recommended 600×225px.
- Has a white/colored background: Re-export your logo as a PNG with a transparent background.
- Colors look wrong in dark mode: Use logo colors that have good contrast on both light and dark backgrounds, or consider a separate dark-mode version if needed.
- Domain Verification Issues:
- DNS records not verifying: Double-check that you copied the exact record names (hosts) and values provided by ReferRush into your DNS provider. Typos are common!
- Verification taking too long: DNS changes (propagation) can sometimes take up to 24-48 hours to fully update across the internet, although it’s often much faster. Wait a while and try verifying again. Check your DNS provider’s TTL (Time To Live) settings.
Personal Support
Need extra help?
Click the “Need Help?” or “Support” button within the ReferRush dashboard (usually in the top-right corner or main menu) to access support options, which may include scheduling a consultation with an email setup specialist. This is great for complex configurations, troubleshooting delivery issues, or getting optimization advice.